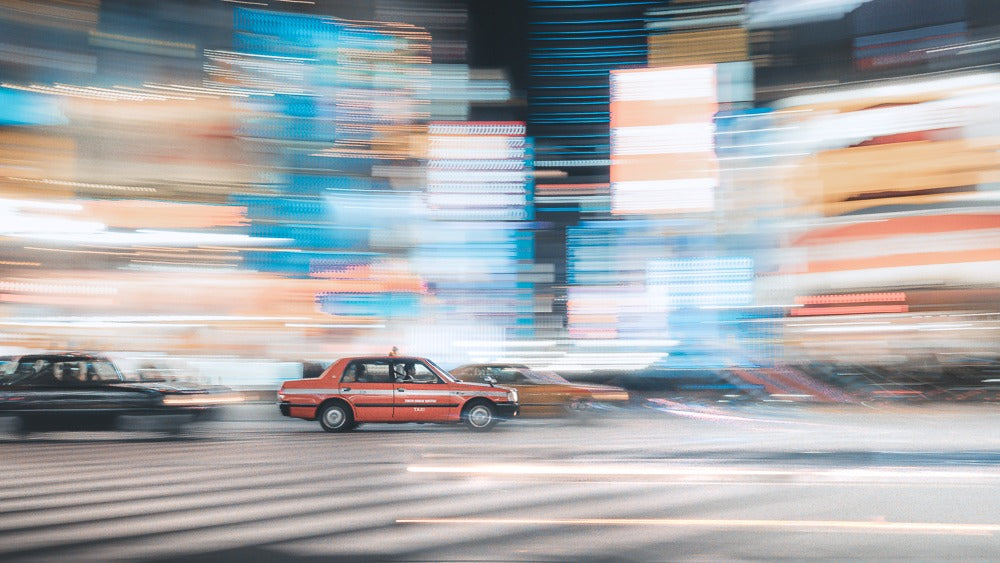
Panning photography is probably one of the most difficult techniques to master in photography.
That’s because it’s a confluence of many things; excellent knowledge over your craft and settings, the vision of the right subject at the right time, the physical practice of actually executing it—all have their specific details to be aware of.
But, if you get it right, it can be a unique effect. It’s flashy, it’s interesting, it’s visually striking, and it takes a lot of skill to master.
It’s certainly worth the time to acquire the skill to add to your toolkit.
This article will show you how to do panning photography correctly and explain each component as we go along.
How to do panning photography
Let’s start with the concept first.
The idea
The idea of panning photography is to introduce motion blur into your scene while keeping your subject sharp.
This can imply a sense of speed or chaos to the viewer, making it look like the subject is zooming across the image.
Panning shots are great for a series of images, adding life and excitement to something like the documentation of urban life, but they can also be strong enough to stand on their own as individual images too, due to how visually striking they are.

How to do the panning photography body movement
So, let’s start with the body movement of a panning shot.
First, let’s set up in landscape orientation.
What you want to do is:
- Put your viewfinder to your eye with both hands on the camera.
- Tuck your elbows in, pressing them tight against your torso so that you have 3 points of stable contact on your camera (your eye to your camera, each one of your arms connected to your torso).
- Have both of your feet facing forward, knees slightly bent and planted; don’t move them while performing the motion.
- Turn your torso only towards the point of entry your subject will be coming from in your scene.
- As your subject travels across your scene, turn your torso to track it and match its speed. Hold your shutter button. Burst fire.
- While it’s travelling across the frame, keep the subject in the same position in the image as you’re rotating.
- It’s crucial to be turning at the same speed as your subject is moving.
This takes a tremendous amount of practice. Like, many many many hours of practice. Thousands of frames to master.
However, it gets easier once you know the right settings.

The settings
To execute the shot perfectly, we want very particular settings depending on how wide or how narrow our scenes are.
We also want the settings that are going to provide us with the greatest chance to nail a super sharp subject and a blurry trail as frequently as possible.
A great example place to start is to focus on a small subject at around 24mm, using continuous autofocus, a spot-style focus point, 1/30sec shutter speed (to begin with), f11, auto ISO, your fastest burst fire rate.
Now, let’s dig into why.
Focal length
Wider is a better place to start for most beginners. Why? Because wider focal lengths are more forgiving with camera shake because the movements aren’t as minute.
The more zoomed in you are, the smaller, more minute, and more precise your hand adjustments you need to be to achieve a similar result with a wide-angle lens.
It’s far easier to shoot wide and be somewhat close (10-30m away) to your subject than it is to be far with a longer lens.
So practice with wide first, and as you progress in skill, feel free to increase the distance of your focal lengths or even start to introduce tripods if you like.
Autofocus mode
There are two methods for focus that are useful in panning photography, and the easier one for most people is a continuous focus mode.
Of course, they’re all called different things for all camera manufacturers, but what you want is an autofocus mode that continually polls the same selected position of your focus area.
Another alternative is to manually focus where your subject will eventually be in your image, and that’s fine if you’re okay with zone focusing.
This autofocus alternative is just a better, more accessible version of that (as your zone changes throughout the motion due to the focal distance being triangle-shaped, and autofocus gives you the greatest chance of nailing that dynamic distance change).

Consider this example - Say you’re standing 90 degrees facing a road (so you’re not parallel to it), directly looking at it from left to right. Say your subject is a car. And say you want a shot where the resulting composition you’re trying to go for is right in front of you.
As the car approaches the space in front of you, the critical thing to remember here is that the car is constantly changing its distance from you.
When it first enters the scene, it’s far away. When it ends up right in front of you, it’s the closest point to you that it will be in your scene. Then after, it will go back to distancing itself from you again.
Far, near, far.
Therefore, we want our focus settings to be able to accommodate for this constant change in focal plane distance, and thus, the easiest way is to use autofocus.
Autofocus area
With a continuous focus mode, you want to pick a single point where your subject will be so that you can keep your focus locked on that subject as you swing your torso and pan through the scene.
Doing this will give the autofocus a much easier time vs a wider, more broad approach where there’s a possibility of the camera focusing on something else.

Shutter speed
Shutter speed in panning photography controls how much motion blur is in the image.
The slower the shutter speed, the more blur, but also, the harder it is to achieve a sharp subject.
In addition, typically, the wider your focal length is or the smaller your subject is, the less motion blur you’ll get, therefore having to slow down your shutter speed to compensate.
The goal is to achieve as much motion blur as possible, while keeping your subject sharp.
This requires a lot of experimentation. The shutter speed will always change depending on what your focal length is, the size of your subject, the distance to your subject, and how much motion blur you want.
An excellent method to approach this with is to start fast, then progress slower.
- 1/30sec - Start here. Get a couple of shots off and see if you can keep your subjects sharp while producing a little blur.
- 1/15sec - Then, move to 1/15sec and see if you can get some sharp shots with this speed.
- 1/8sec - Most people will be back and forth between this speed and 1/15sec for absolutely tack sharp (not “kinda” sharp) subjects.
- 1/4sec - From here and slower, it’s challenging to achieve an absolutely tack-sharp subject. That doesn’t mean you can’t try, it’s certainly doable, but just be prepared to fail a lot.
Your goal here is to have your shutter speed set to something comfortable for you while making sure your subjects are absolutely razor sharp.
Try not to cheat yourself when it comes to sharpness. Yes, panning is hard, but you know what sharp really looks like if you’re honest with yourself, so keep practising until you get there.
Aperture
We want a deep depth of field.
I know it’s tempting, especially at night, to get stuck with the idea of creamy bokeh and fast f1.4 lenses, but the reality is that bokeh doesn’t really exist in panning photography.
When motion blur is applied, the creamy backgrounds get lost in all the chaos of the blur. Bokeh is indistinguishable.
In addition, with your shutter speeds being so low, you’ll probably be way overexposed anyway.
Rather, what you’re looking for are settings that will increase your strike rate of nailing focus every time. Therefore, we use an aperture with a deep depth of field like f8 or f11 or more.
Again, consider the case of shooting a car as your subject.
If the car is 5m away from you while you’re panning and you’re shooting with an f1.4, your actual depth of field is very very thin; far thinner than even the actual width of the car.
This reduces your chances of getting the car in focus to begin with.
However, by using something deep like f11, we might be able to have a few metres worth of depth of field, giving ourselves the maximum amount of chance that our target part of the car will be in focus.

ISO
I personally like to leave this at auto in a bracket, as there’s already a bunch to worry about when it comes to settings anyway.
Also, depending on your scene, especially if you’re shooting darker urban scenes of roads, exposure can change as you’re panning due to things like street lights, oncoming headlamps etc.
Burst fire rate
As fast as she’ll go, of course.
You want to snap as many frames as possible in the shortest time, although in most cases, a slower shutter speed will slow you down tremendously anyway.
Still, better to set it for as fast as you can.
Practice and expectations
The next part after you’ve got the movements and settings down is to practice, practice, practice!
Panning photography is extremely difficult.
To set expectations, it’s not uncommon for you to walk away with literally hundreds, if not thousands of frames from a couple of hours of trying to practice this, to have only less than a dozen usable images on your first few tries.
It takes a lot of practice to get right.
However, with persistence, a decent chunk of time, and a lot of experimentation, you should be able to get to the point where you can generate a useable image from every one or two attempts. It’s possible.

A side note on Photoshop
You might see images on Instagram or elsewhere that feature a panning effect, but it’s so pronounced you have no idea how it was shot.
Well, chances are, it’s probably fake.
There are many people who can’t actually pan that well, and who then use Photoshop and the motion blur effect to fake a pan in an image.
Once you’ve mastered panning and you know the limits of how far human hands can take you, it’s very very easy to spot a real one from a fake Photoshopped one.
But of course, that won’t stop the pretenders from having you believe it’s real. Just be mindful about those so that you’re not aspiring to something that can’t actually be done in reality.
tl;dr
Panning photography is a very visually interesting technique, but a very difficult one to achieve.
It requires a confluence of many things; the perfect subject, the perfect settings, the perfect physical execution.
But the payoff is always worth it; it’s a great technique to add to your toolkit of abilities.
When it comes to physical execution, using only your torso to track your subject through the pan will ensure a stable platform and provide the highest amount of usable images.
When it comes to settings, a great example place to start is to focus on a small subject at 24mm, using continuous autofocus, a spot-style focus point, 1/30sec shutter speed (to begin with), f11, auto ISO, and your fastest burst fire rate.
With these tips in addition to a few hours of practice, you’ll be nailing your panning photography in no time.


1 comments
Cisco @ Sat, Jan 23, 21
Thank you so much for this! Really find your work inspiring.